
Content:
The Wii U 160-1400 error occurs when the Wii U is unable to communicate correctly with the optical drive. This could be due to the drive being unpowered, a defective cable/clip connecting the drive to the console, or a disconnect somewhere on the drive board or Wii U motherboard.
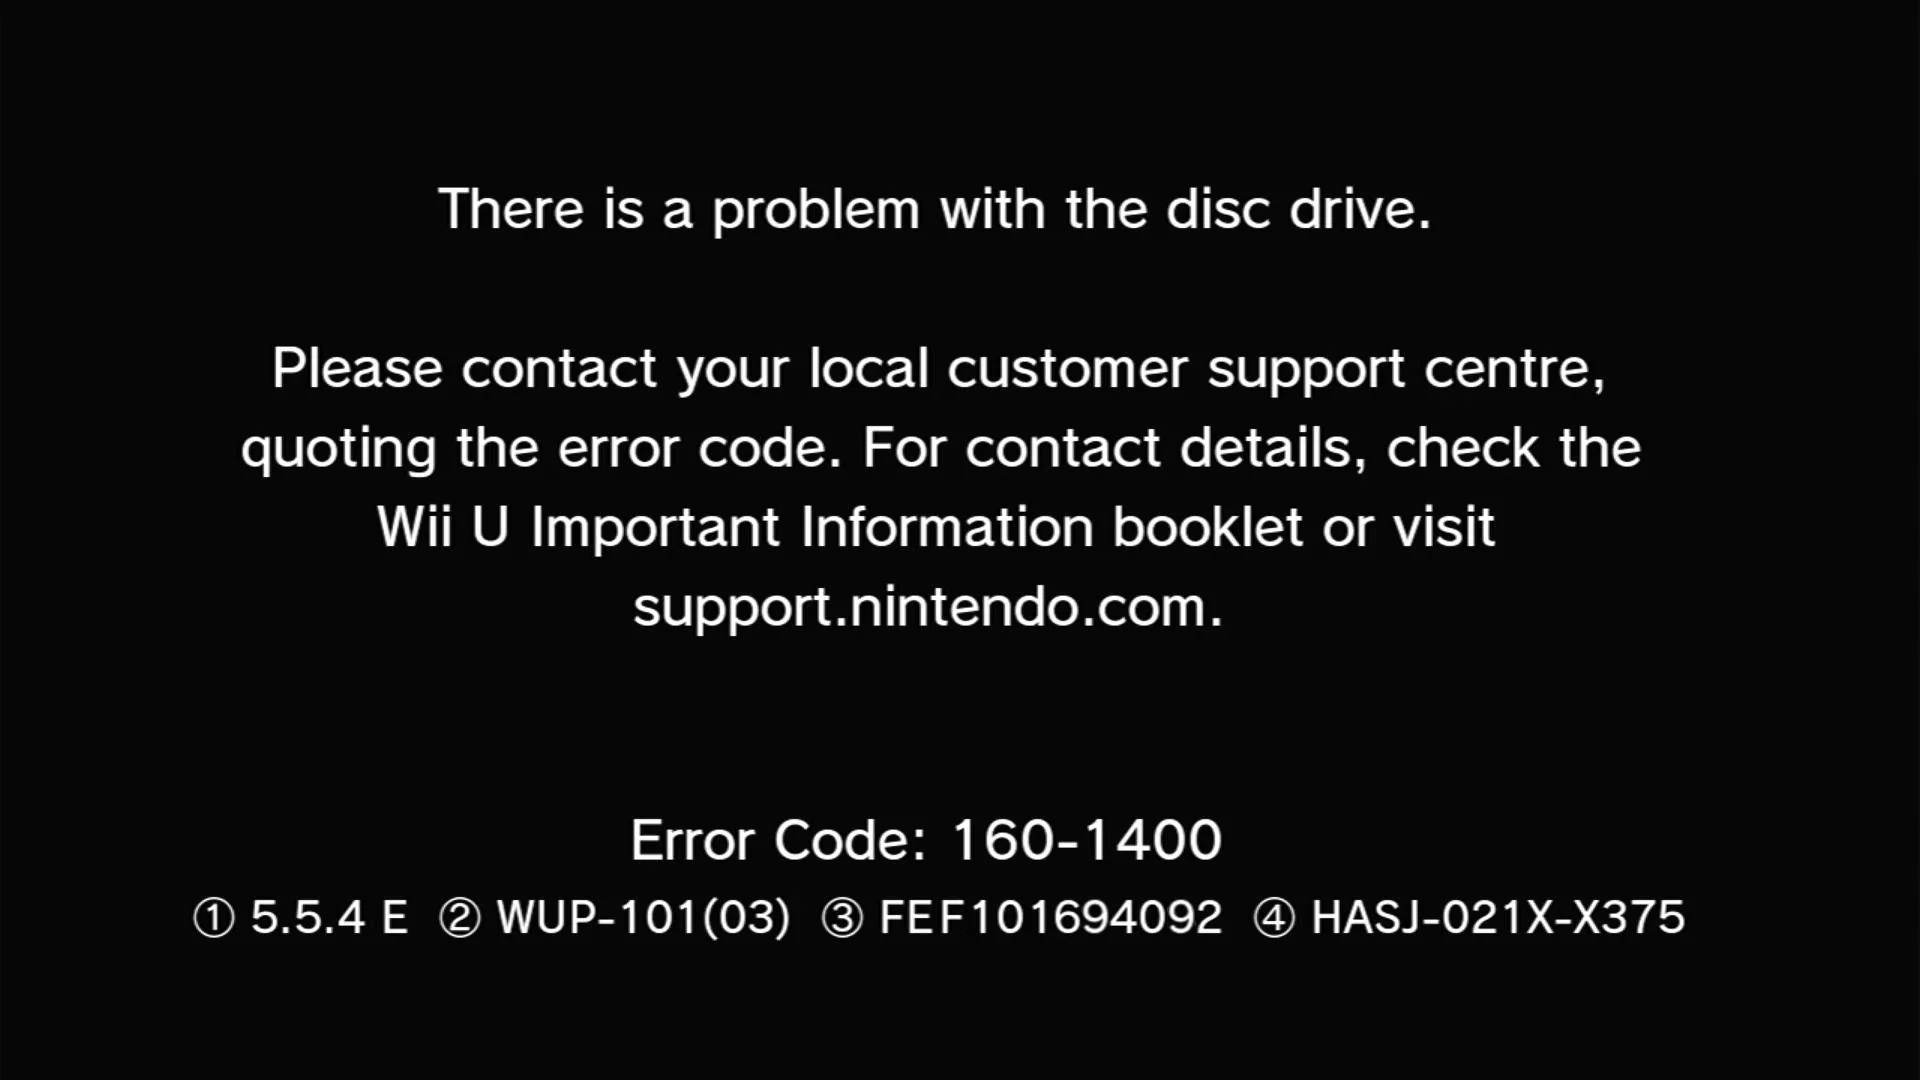
A common cause of this issue is a fault with a filter on the data lines which run from the drive to the console. When a filter fails open, the connection is broken, and data can no longer be transferred correctly.
This guide will show you how to check and replace the optical drive filters in your Wii U console. You can also check out our video guide below if you’d rather view the process.

Fixing a Wii U 160-1400 Error
In this video, I show you how to fix a Wii U 160-1400 error.
Testing the Filters
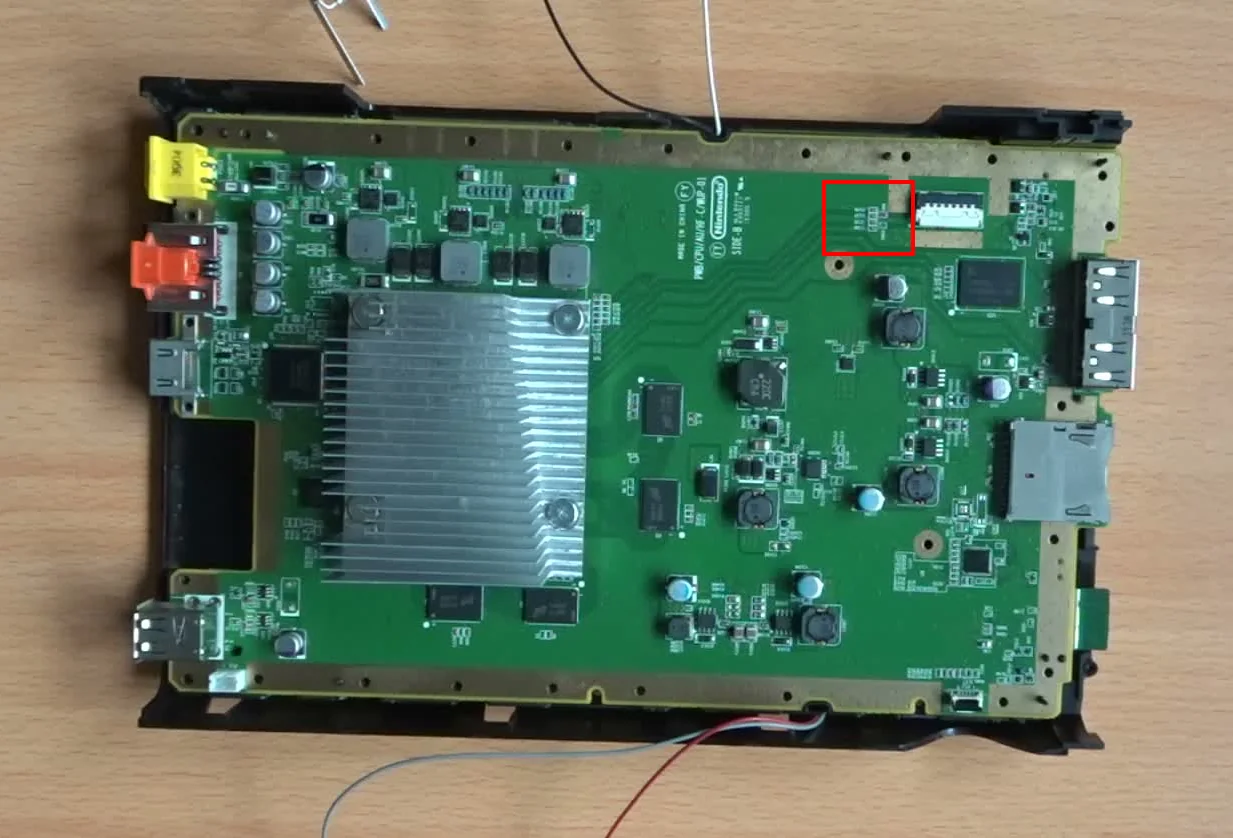
Before getting out the soldering iron, you can check for a faulty filter using a multimeter. You’ll need to strip the console down to the bare PCB, which we’ll leave out of this guide for brevity. Gaining access to the filters does require a full teardown, but fortunately, the Wii U is not the most complex of consoles.
Take extra care when unscrewing the front panel from the chassis, as in our experience, they are very securely fitted, and easy to strip if you use the wrong size of screwdriver or don’t put enough downward pressure on the screwdriver.
The filters can be found close to the connector for the optical drive cable, labelled CM9 and CM10.
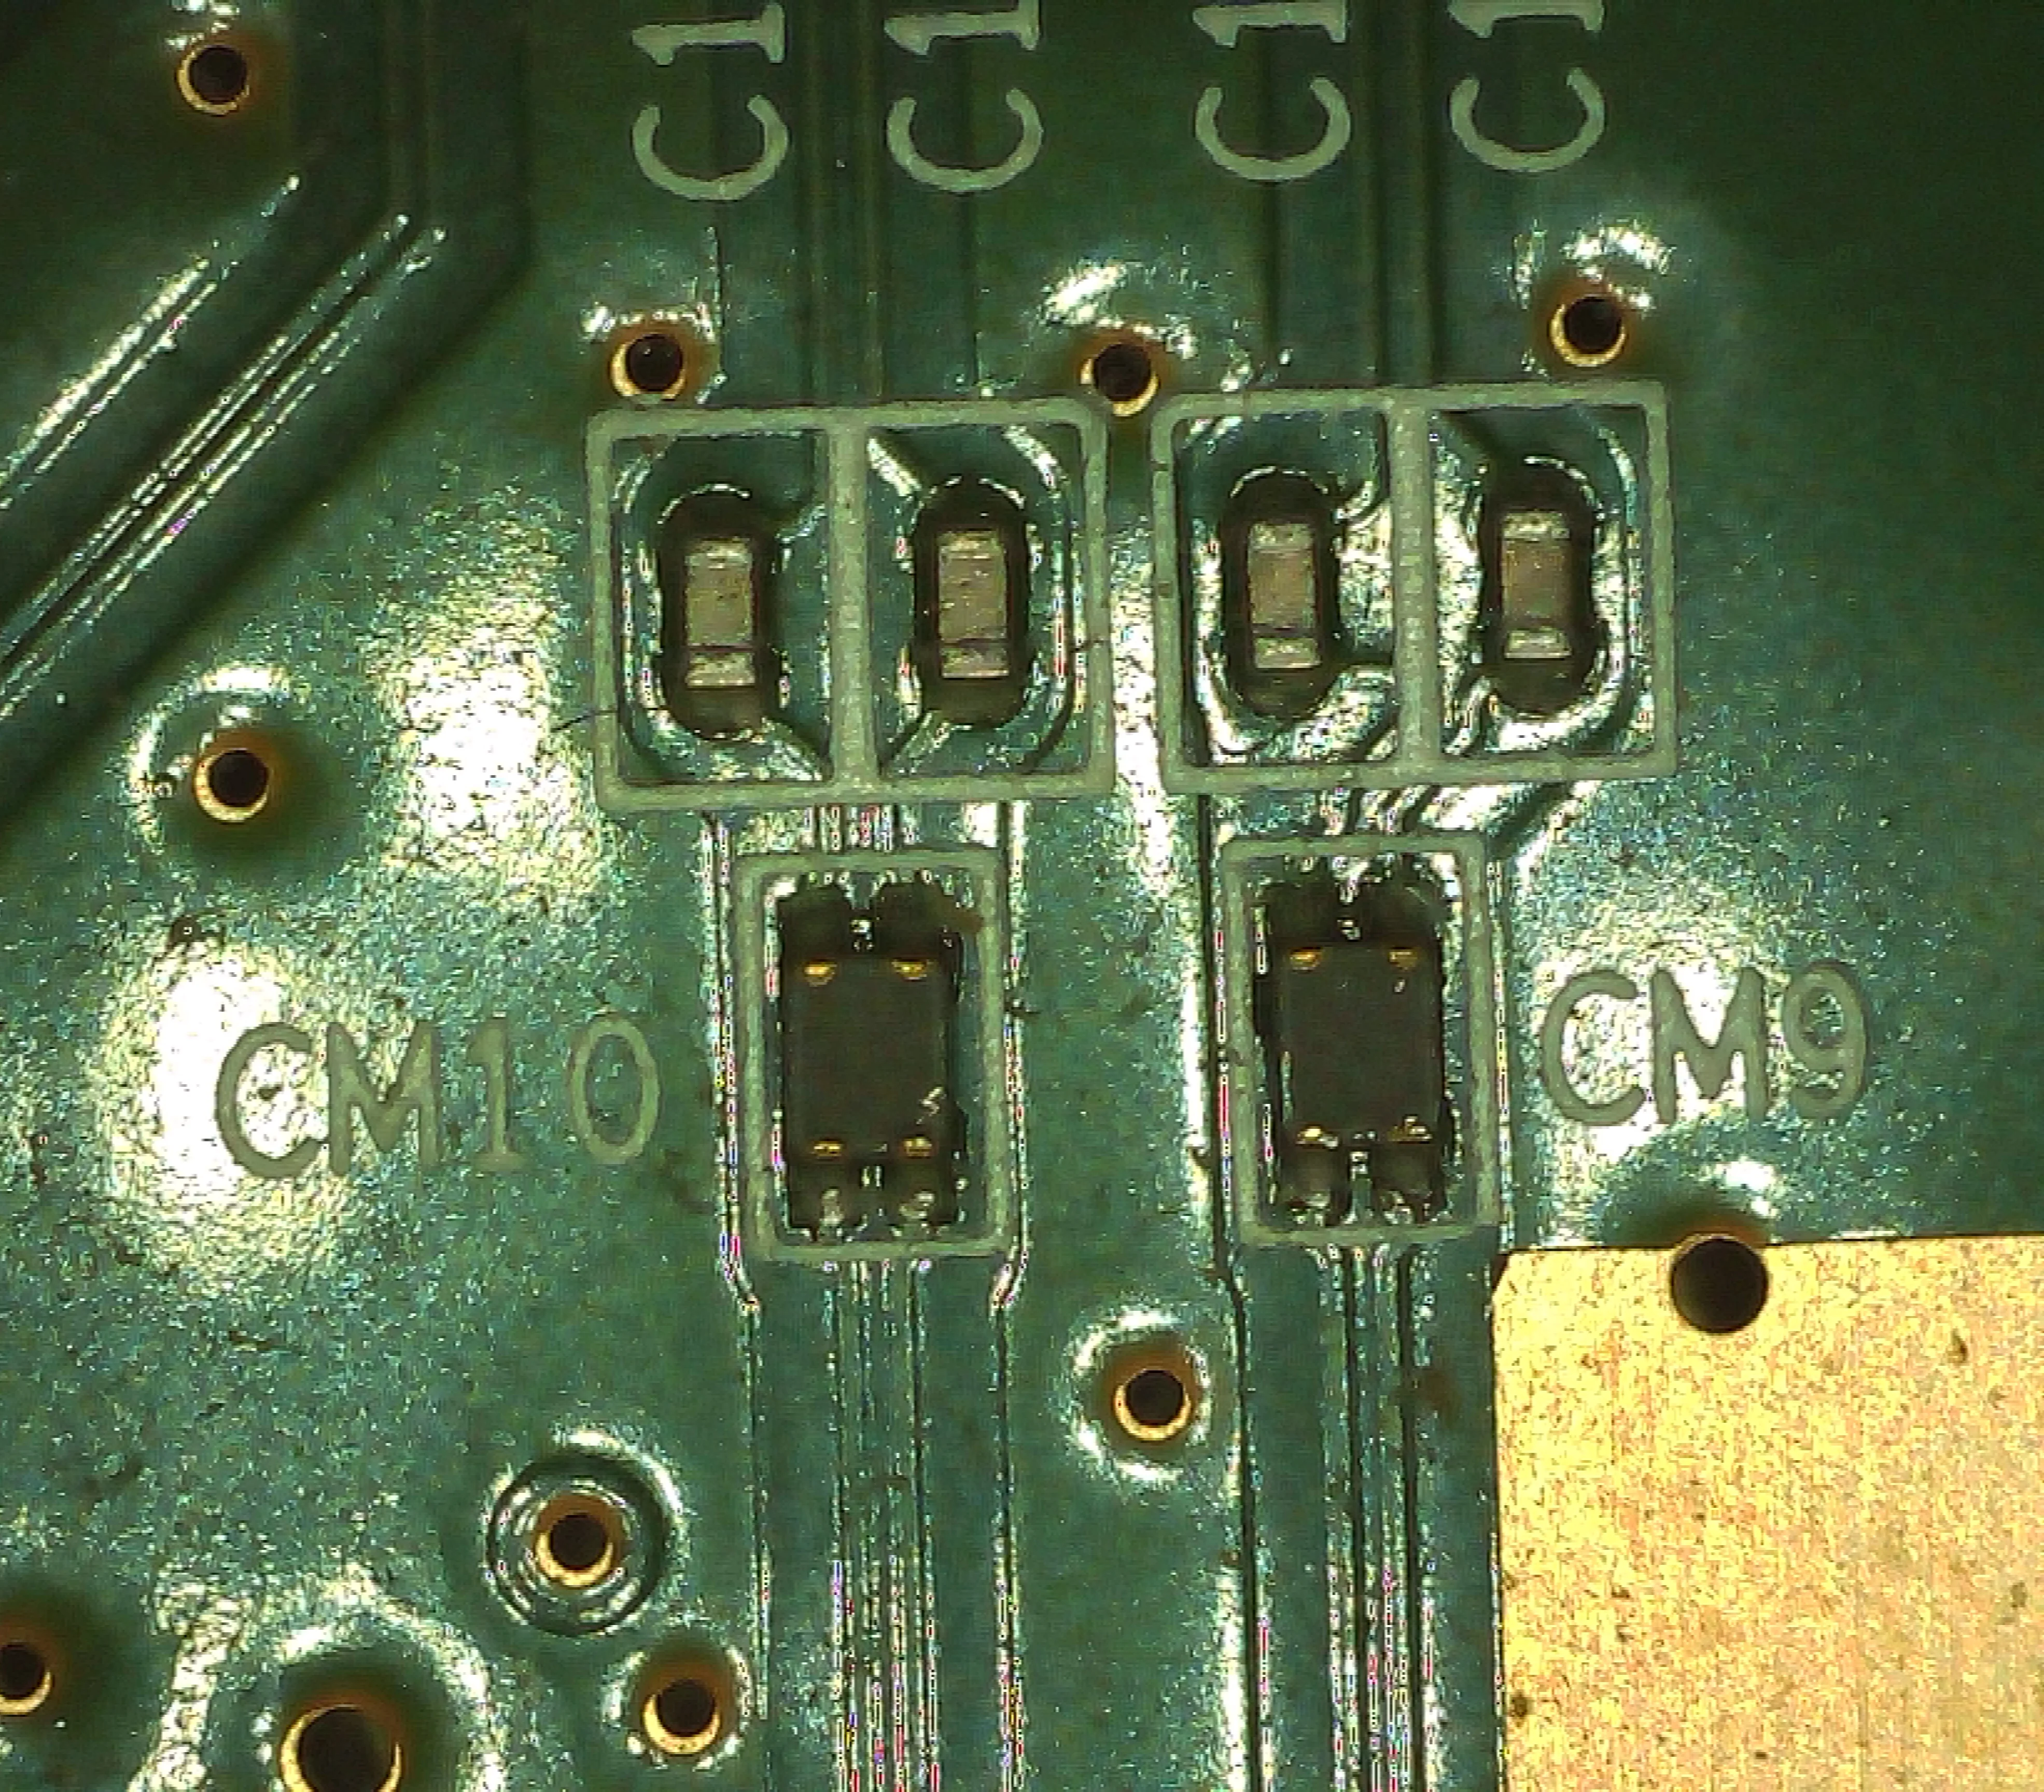
The filters are very small, so you’ll want to have the smallest leads possible on your multimeter. Using the photo above as reference, signals pass through the filter from top to bottom so you need to test for continuity between the two left-hand pins (top and bottom), and then the two right-hand pins, to check both signal traces are connected.
It’s possible that one, or both, of the filters are faulty. If you have continuity across both pairs of pins on a filter, it does not need replacing.
Assuming at least one of the filters has a broken connection, continue to the section below. If the filters are good, the issue lies elsewhere – check the cable is in good condition, and the latches are holding the cable securely.
Replacing the Filters
It’s possible to fit replacement filters, if you’re able to get hold of some. This would be the best solution (after all, if they didn’t serve a purpose, why did Nintendo put them there?). That said, the exact part has been discontinued by the manufacturer, and alternatives are hard to source.
Instead, it’s possible to simply bridge the pairs of pads across the filter, to repair the connection to the drive.
Given the small size of the pads, enamelled wire and plenty of flux are recommended. A small tip would probably help too.
Once the wires are soldered, you can test the connection again with a multimeter – though make sure you’re testing from pad to pad, as the wire will obviously have continuity with itself!
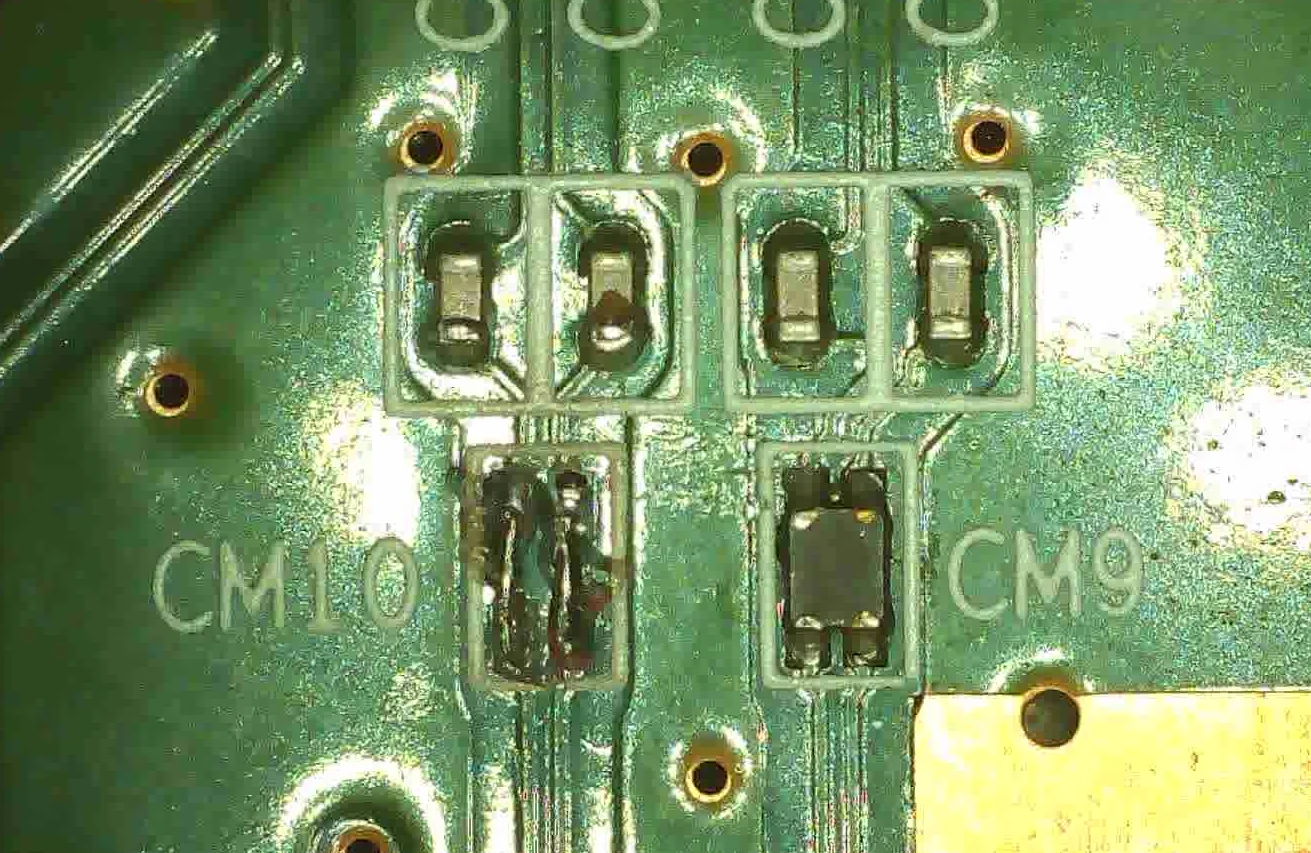
The photo above shows the bridge wires added to replace filter CM10, which ws faulty.
Testing
You can test the console without a full reassembly, though if you do this, be careful with the drive cable/latch. You’ll need to plug the front panel back in to gain access to the power button.
If you don’t hear the optical drive power up, or the eject LED is illuminated (assuming no disc is inserted), check that the cable is in securely. You should hear the drive power up when the console is turned on.
If the error is still showing, double check your soldering and try again.
If you’re able to log in to the console without the error, you can go ahead and reassemble the console completely.


